Showing posts with label cookies. Show all posts

Tuesday, December 21, 2010

Reindeer Cookies

Someone made these cookies for Jacob's holiday party last week and I just had to try and make them. There really isn't a recipe for them it is more of decorating cookie dough. The only thing I did different was use sugar cookie dough instead of peanut butter cookie dough. I used a heart shaped cookie cuter instead of trying to make triangles. I also put the M&Ms on before they went into the oven and stuck all the chocolate stuff on when they came out of the oven...super easy and super cute!


Monday, November 8, 2010

Margarita Cookies

We just celebrated my husband's grandparents 90th birthday this past weekend. Of course I took this opportunity to try out a recipe I have had on my list forever. I was also missing our Friday Night Fun nights a little bit and this recipe reminded me of it.

I got the recipe from
Smitten Kitchen which you should stop over and look at the step by step pictures. I have to say mine looked just like the pictures (for once) and since my camera is still on it's way out and I packaged up the cookie right away for the party I didn't get any.

Margarita Cookies
Adapted from Dorie Greenspan’s Sablés au Citron

Makes about 50 cookies

2 sticks (8 ounces; 230 grams) unsalted butter, at room temperature
2/3 cup (70 grams) confectioners’ sugar, sifted
2 large egg yolks, at room temperature
Pinch of salt
2 teaspoons tequila
Grated zest of 2 limes
Grate zest of half an orange
2 cups (280 grams) all-purpose flour

Coating:
Approximately 1/2 cup clear sanding or other coarse sugar
2 teaspoons flaky Maldon sea salt*

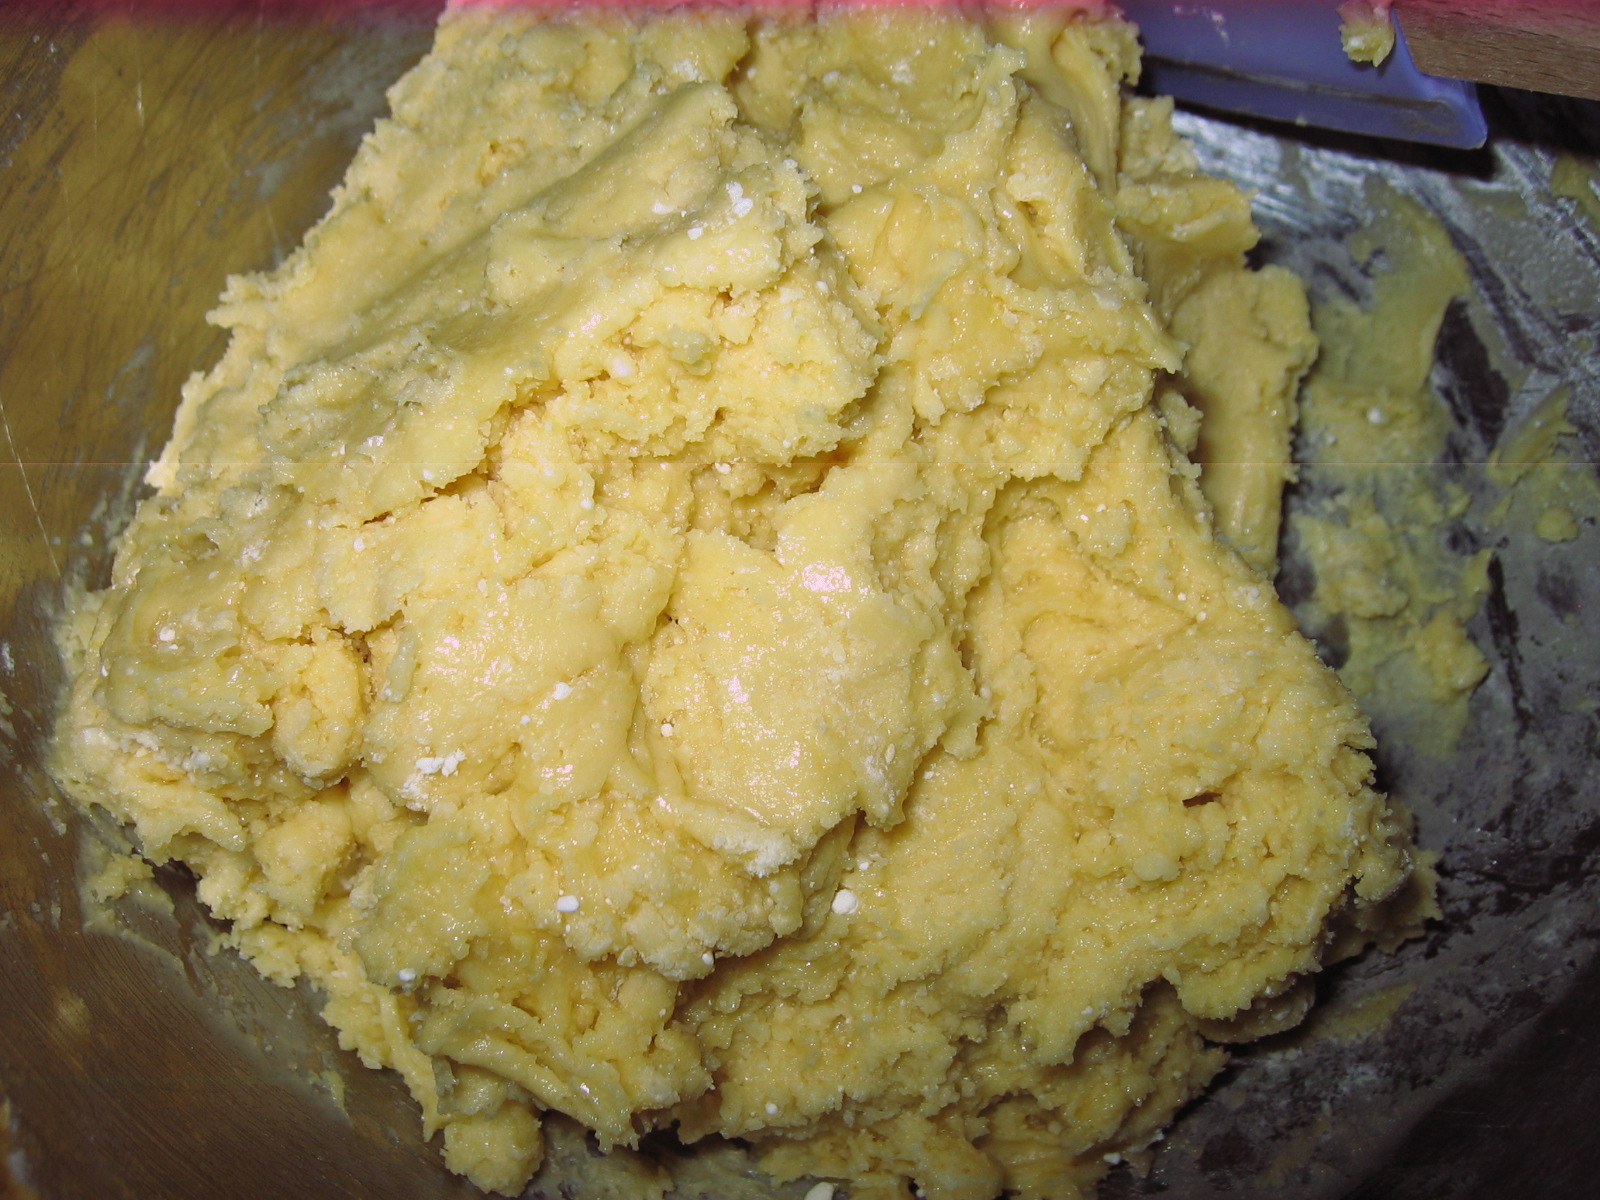
1. Put the butter in the bowl of a mixer fitted with the paddle attachment and beat at medium speed until it is smooth. Add the sifted confectioners’ sugar and beat again until the mixture is smooth and silky. Beat in 1 of the egg yolks, followed by the salt, tequila, grated lime and orange zest. Reduce the mixer speed to low and add the flour, beating just until it disappears. It is better to underbeat than overbeat at this point; if the flour isn’t fully incorporated, that’s ok–just blend in whatever remaining flour needs blending with a rubber spatula. Turn the dough out onto a counter, gather it into a ball, and divide it in half. Wrap each piece of dough in plastic wrap and refrigerate for about 30 minutes.

2. Working on a smooth surface, form each piece of dough into a log that is about 1 to 1 1/4 inches (2.5 to 3.2 cm) thick. (Get the thickness right, and the length you end up with will be fine.) Wrap the logs in plastic and chill for 2 hours. (The dough can be wrapped airtight and kept refrigerated for up to 3 days or stored in the freezer for up to 1 month.)

3. Position the racks to divide the oven into thirds and preheat the oven to 350°F (180°C). Line two baking sheets with parchment paper.

4. While the oven is preheating, work on the sugar coating: Whisk the remaining egg yolk in a small bowl until it is smooth and liquid enough to use as a glaze. Mix the coarse sugar and flaky salt well and spread the mixture out on a piece of wax paper. Remove the logs of dough from the refrigerator, unwrap them, and brush them lightly with a little egg yolk. Roll the logs in the sugar, pressing the sugar/salt mixture gently to get it to stick if necessary, then, using a sharp slender knife, slice each log into cookies about 1/4 inch (7 mm) thick. [Deb note: To get the sugar/salt mixture to stick better, I moved the log over to a piece of plastic wrap, and in the sort of technique you'd see a sushi chef use to shape a roll, use the plastic to press the sugar in by wrapping it tightly.] (You can make the cookies thicker if you’d like; just bake them longer.) Place the cookies on the lined baking sheets, leaving about 1/2 inch (1.5 cm) space between them.

5. Bake the cookies for 12 to 14 minutes, or until they are set but not browned. (It’s fine if the yolk-brushed edges brown a smidgen.) Transfer the cookies to cooling racks to cool to room temperature.

Keeping: Packed airtight, the cookies will keep for about 5 days at room temperature. Because the sugar coating will melt, these cookies are not suitable for freezing.

* Updated to add that if you should choose to use regular table salt and not Maldon, use less! Much less. Probably half or less. Because Maldon has such volume, the equivalent amount of a finer salt would be much more pungent. Better on the safe side than sorry, right?


Review: Like I said in the post above I really have been missing our Friday night fun nights...and I was hoping this would cure that. I also have had this recipe on my list of things I want to make for a long time. Making the recipe was not bad at all...I did steps one and two one day and continued with the rest the next day. I used kosher salt on the outside and I think that added that real margarita feel to it to have the salty/sweet combo. Everyone at the party seemed to really enjoy the cookies and I think this one might be a keeper...


Wednesday, July 28, 2010

May The Force Be With You...

I am one of those people when I get a gift card it either takes me a minute to spend it all or forever to spend it all. Ok the taking forever to spend really doesn't happen to me that often but every once in a while it does. I got one from Williams-Sonoma two years ago and I just finished this week. I guess I was just waiting to see if there was anything I really wanted before I spent it on another spatula. Then I saw the Star Wars cookie cutters that are exclusively William - Sonoma...just what I was waiting for.

My 4 year old is all about Star Wars...the movies, the games, the toys and even the clothes. So when I showed this to him that was it...his eyes got huge and I know I had to get it. The next morning he was already asking for Darth Vader cookies.


I made the recipe that came with the cookie cutters because I figured it would give me a good idea of the dough that would work best with the cutters.


Star Wars Cookies
Williams-Sonoma


2 1/2 cups (390 g)All-Purpose Flour

1/2 tsp salt

12 Tbs (1 1/2 sticks/185g) Unsalted Butter

1 cup (250 g) Sugar

1 Egg

1 1/2 tsp Vanilla Extract


Have all the ingredients at room temperature.


Over a small bowl, sift together the flour and salt. Set aside.


In the bowl of an electric mixer fitted with the flat beater, beat the butter on hight speed until creamy, about 2 minutes. Reduce the speed to medium, slowly add the sugar and beat until light and fluffy, about 2 minutes, stopping the mixter occasionally to scrape down the sides of the bowl. Add the egg and vanilla and beat for 1 minute, stopping once to scrape down the sides of the bowl.


Stop the mixer and add half of the flour mixture. Beat on low speed until most of the flour has been absorbed, about 1 minute. Add the remaining flour and continue beating until all the flour has been absorbed and the dough starts to pull away from the sides of the bowl, 2 to 3 minutes.


Turn the dough out onto a work surface and divide into 2 equal balls. Shape each into a disk and wrap separately in plastic wrap. Refrigerate for at least 2 hours or up to 2 days.


Remove the dough from the refrigerator and let stand for 5 minutes. On a lightly floured surface, roll out the dough 3/16 to 1/4 inch ( 4.5 to 6mm) thick.


Preheat an oven to 350. Line several baking sheets with parchment paper.


Using the cookie cutters, cut out the desired shapes. If the dough sticks to the cutter, dip the cutter into flour before cutting out more shapes. Using a small offset spatula, transfer the cookies to the prepared baking sheets, spacing them about 1 inch apart.


Bake the cookies until golden brown around the edges, 10 to 15 minutes. If baking more than one sheet at a time, rotate the baking sheets from top to bottom and 180 degrees halfway through baking.


Transfer the baking sheets to wire racks and let cool for 5 minutes, then transfer the cookies to the racks and let cool completely. Decorate as desired. Store the cookies in an airtight container at room temperature for up to 3 days. Makes about 8 of each cookie.


Review: I have another recipe for rolled cookies which I haven't made in really long time but this one I think is a keeper as well. It was nice to work with and has a great taste. Next time I might try to use some almond extract instead of or a combo of both vanilla and almond.

I have been following another blog called
University of Cookie because it is one of my goals to make cookies like the ones on that blog. Well there is a post on there called Rolling Cookie Dough: a video tutorial. I watched it a couple of times and did what she said...and it worked for me!! The one thing I hated most about making cut out cookies was the rolling out of the dough because mine always cracked and just didn't work well for me. Well no more because of that post and I am actually excited to make more.

One idea I am throwing around is making sandwiches with the Star Wars cookie cutters...chocolate/vanilla middle for Darth (my husband thinks that is fitting since he was good on the instead which is what the vanilla would represent), I think a minty green flavor combo for Yoda and not sure about the other two but I am sure I can come up with something.

Sunday, June 6, 2010

Lemon Cookies

I volunteered to make a dessert for Karen's bridal shower and decided on making some cookies. My first choice was going to be the chocolate mint chip cookies I made a while back but since Kath was making her super yummy brownies I wanted something that wasn't chocolate.

I decided on making two different things...my
biscotti and Lemon Cake Cookies. Someone I worked with gave me a REALLY good recipe for the lemon cake cookies but I didn't have the time to make that version. The reason why I did not have the time is because I need to bake after the kids go to sleep. I am not sure if any of you have this problem but I can't really bake with my kids around. The reason being is because Jacob will ask me every 5 minutes...is it ready...can I have some...what are you making...can I have some...is it ready and this will go on the whole entire time.

Easy Lemon Cookies

allrecipes.com


1 (18.25 ounce) package lemon cake mix

2 eggs

1/3 cup vegetable oil

1 teaspoon lemon extract

1/3 cup confectioners' sugar for decoration


1) Preheat oven to 375 degrees F (190 degrees C).

2) Pour cake mix into a large bowl. Stir in eggs, oil, and lemon extract until well blended. Drop teaspoonfuls of dough into a bowl of confectioners' sugar. Roll them around until they're lightly covered. Once sugared, put them on an ungreased cookie sheet.


3)Bake for 6 to 9 minutes in the preheated oven. The bottoms will be light brown, and the insides chewy.


Review: I really did not know what the expect from these cookies but I was pleasantly surprised. They came out great and really something that is easy to make...5 ingredients and you don't have to break out your mixer! If you go on allrecipe.com and look at their pictures the cookies have more sugar on them. I am not really sure why my sugar disappeared. I might try rolling them in coarse or granulated sugar the next time I make these cookies. This one is a keeper for sure!

Thursday, February 11, 2010

Pumpkin Cookies

Yesterday we had a blizzard warning type snow storm. So I decided to make sure I had supplies in the house to be able to bake something...that is of course after I made sure I had the regular supplies in the house.

A friend of mine gave me this recipe last week and I thought it was the perfect one to make. One it only has 6 ingredients and two it seemed to be a non time consuming one as well.


Pumpkin Cranberry Cookies
Pillsbury.com

1 (14-oz.) pkg. Pillsbury® Pumpkin Quick Bread Muffin Mix
1/2 cup dried Cranberries or cinnamon covered raisins
1/2 cup butter or margarine, melted
1 egg
1/4 cup sugar
1 teaspoon cinnamon


DIRECTIONS

1.Heat oven to 350°F. In large bowl, combine quick bread mix, raisins and ginger; mix well. Add butter and egg; stir until dry particles are moistened. (Mixture may be crumbly.)


2.In small bowl, combine sugar and cinnamon; mix well. Shape dough into 1 1/2-inch balls; roll in sugar-cinnamon mixture. Place 2 inches apart on ungreased cookie sheets.


3.Bake at 350°F. for 12 to 15 minutes or until cookies are set. Remove from cookie sheets.


Review: I can't stop eating these cookies...they are so addicting. Super easy to make since most of the work is just opening a package and adding the rest of the ingredients. A perfect fall flavor cookie and something I would make for Thanksgiving in a heart beat. I wonder if you could make other cookies like this one with a different mix. Definitely a keeper!

Wednesday, December 30, 2009

A Yummy Disaster...

I don't know why it matters but I think it is amazing that this is my 10th year celebrating Christmas with my husband's family. The celebrations style has evolved and so has the size of the family (there are now 5 little boys added) but really it is still the same.

Also I reminded Mike that he has had my sugar cookies at the table for the past 10 years...what did he do before them. He did not remember me bringing them the first year but I remember it so well. First time meeting my in-laws (at the time I did not know they would be my in-laws) and his WHOLE entire family. I needed to bring something that would impress and boy did they ever. I think I would be put out in the cold if I did not bring them with me.

The other thing I brought with me then were rum balls. Me being the silent dork that I am wanted to make them again. The first time they came out well but when I tried to make them now I failed miserably...Mike is now enjoying them as what I like to call Rum Crumbs.

I had a lot of leftover pecans and wanted to make something with them. So I searched a new cookie cookbook I got from Karen and found ones called Pecan Meltaways...


Pecan Meltaways

Taste of Home

1 cup butter, softened
1/2 cup confectioners' sugar
1 teaspoon vanilla extract
2-1/4 cups all-purpose flour
1/4 teaspoon salt
3/4 cup chopped pecans
Additional confectioners' sugar

Directions

  • In a large bowl, cream the butter, confectioners' sugar and vanilla until light and fluffy. Combine flour and salt; gradually add to creamed mixture and mix well. Stir in pecans. Refrigerate until chilled.
  • Roll into 1-in. balls and place on ungreased baking sheets. Bake at 350° for 10-12 minutes or until set. Roll warm cookies in additional confectioners' sugar; cool completely on wire racks. Roll cooled cookies again in confectioners' sugar. Yield: 4 dozen.
Review: This is a perfect cookie to add to your holiday baking list. Super easy to make and super yummy! The one problem I had with the recipe is that it does not tell you how long to chill the dough for...I think 30 minutes to 1 hour would be OK. I think they just need to firm up a bit do they don't spread so much in the oven. I actually had them in the refrigerator for a lot longer because I was trying to do more then I had time to do. I am not sure if I am sold on adding it to my annual list but the family is enjoying eating them.

Sunday, December 20, 2009

December Cookie Recipe #2: Graham Cracker Yummies


Another cookie making memory was making these yummy "cookies" with my mom. They almost are more of a toffee crunch type cookie. Similar to the Dog Turds recipe, sometimes these cookies come out perfect and other times, like this year, not as great. Don't know why, but here is the recipe!

Ingredients:
1 stick butter
1/2 c. brown sugar
1.5 sleeves graham crackers (left whole)
2 c. chocolate chips
1 c. chopped walnuts

Directions:
- Heat oven to 375 degrees
- Line cookie sheet with foil and place graham crackers side-by-side on top of the foil
- In a saucepan, heat butter and brown sugar and let boil 3 minutes
- Pour liquid mixture over graham crackers (make sure to cover all crackers)
- Put in oven for 10 minutes
- Take out and immediately sprinkle chocolate chips on top
- Let the chips melt and spread the chocolate to cover over all crackers
- Sprinkle chopped nuts over the top
- Let chocolate harden
- Break up cookies and store in a container or Ziplock bag

Review: these happen to be one of my favorite Christmas cookies. I like the caramel/toffee crunch. The mixture has to be made just right or it alters the flavor of the cookie. You can vary the chopped nut on top, but I have found that walnuts are just the right compliment.

December Cookie Recipe: Christmas Logs (aka Dog Turds)


Every year there are a couple of cookies that I make from my childhood cookie making with my mom. This recipe was given to my mom by Karen's mom and was affectionately called Dog Turds (forgive me, if I have already posted this before :). My mom hates to call them that, so I "re-named" them Christmas Logs or Chocolate-covered Logs. I think they came out the best that I have ever made them this year, so wanted to post them on our blog!

Ingredients:
2 sticks butter
1 1/4 c. confectionary sugar
2 tsp. vanilla
2 c. flour
1 c. (Quick) oats
1/2 tsp. salt
3/4 c. chocolate chips
3/4 c. chopped walnuts

Directions:
- Cream butter and sugar together
- Add vanila and combine thoroughly
- Mix flour, oats, and salt together
- Pour dry ingredients into mixer (while on)
- Make sure the bottom of the mixing bowl is clean (meaning everything is mixed together)
- Dough will be crumbly
- Take small or medium size balls of dough and roll into 1.5-2" logs
- Bake at 325 degrees for 27 minutes (on an ungreased cookie sheet or Silpat)
- Remove from oven and let cool
- Dip in melted chocolate chips (or spoon and spread on top of the cookie log) and then dip in chopped walnuts
- Let harden and eat!

Review: Some years these come out dry, and this year, they were perfect! They are great with a cup of coffee, or my preference, a glass of milk. Enjoy!

Thursday, December 3, 2009

I Can't Decide...So I Made Both.

Last week Mike asked me to make something for him to bring to work. They are having their annual charity bake sale and FINALLY Mike asked me to make something. I always got a little annoyed at him for not bringing something in...hello you have a wife at home that loves to bake...I would tell him. At first I was going to make individual monkey breads (I was going to make them in a muffin tin) just to have something different there. Since I was making cookies for my neighbor's birthday he said to just give him some of those.

There is a restaurant near me that gives cookies like these for dessert with the kid's meals. It was funny because I was wondering how they made them the other day and then I found a recipe. So of course I had to try it out. The dough was suppose to make A LOT of cookies.


Double Delights
Taste of Home

  • CHOCOLATE DOUGH:
  • 1 cup butter, softened
  • 1-1/2 cups sugar
  • 2 eggs
  • 2 teaspoons vanilla extract
  • 2 cups all-purpose flour
  • 2/3 cup baking cocoa
  • 3/4 teaspoon baking soda
  • 1/2 teaspoon salt
  • 1 cup coarsely chopped pecans
  • 5 ounces white baking chocolate, chopped

  • VANILLA DOUGH:
  • 1 cup butter, softened
  • 1-1/2 cups sugar
  • 2 eggs
  • 2 teaspoons vanilla extract
  • 2-3/4 cups all-purpose flour
  • 2 teaspoons cream of tartar
  • 1 teaspoon baking soda
  • 1/2 teaspoon salt
  • 1 cup coarsely chopped pecans
  • 4 ounces German sweet chocolate, chopped

Directions

  • For chocolate dough, in a large bowl, cream butter and sugar until light and fluffy. Beat in eggs and vanilla. Combine the flour, cocoa, baking soda and salt; gradually add to creamed mixture and mix well. Stir in pecans and white chocolate.
  • For vanilla dough, in another large bowl, cream butter and sugar until light and fluffy. Beat in eggs and vanilla. Combine the flour, cream of tartar, baking soda and salt; gradually add to creamed mixture and mix well. Stir in pecans and German chocolate. Cover and refrigerate both doughs for 2 hours.
  • Divide both doughs in half. Shape each portion into a 12-in. roll; wrap in plastic wrap. Refrigerate for 3 hours or until firm.
  • Unwrap and cut each roll in half lengthwise. Place a chocolate half and vanilla half together, pressing to form a log; wrap in plastic wrap. Refrigerate for 1 hour or until the dough holds together when cut.
  • Using a serrated knife, cut into 1/4-in. slices. Place 2 in. apart on greased baking sheets. Bake at 350° for 8-10 minutes or until set. Remove to wire racks to cool


Review: I made these cookies for a couple of reason one which I stated above because they were like the ones from the restaurant. The other reason was it stated it makes 15 dozen cookies...SO not the case. Maybe I can get 7 dozen out of this but I am not even sure of that. It makes two logs which I baked one and froze the other to bake for Christmas. The one log I think I might have gotten 3 dozen. I don't think I could have cut the cookies any thinner then I did...the were pretty thin to begin with. That being said the dough was easy to make and did not take that much time. I think you need to let the sit in the refrigerator a little longer then stated in the recipe to get them firm enough. Also I think if you put the in the freezer before you slice them it would make that process easier. The overall taste is super yummy and addictive. Not sure if i would make these again or try to find another recipe for the dough and just use the same technique. I have to wait and see how the guys at Mike's office liked them.

Tuesday, December 1, 2009

Dark Chocolate & Mint Chips

I love mint stuff and when I saw the package of dark chocolate and mint morsels that Nestle has out now I had to buy it. I did not know what or when I was going to use them...minor details.

Then I was asked to make my sugar cookies for Thanksgiving which everyone loves. I took out the butter to soften and the day just got away from me. The butter was way too soft to make the sugar cookies and so I decided to use the butter to make the cookie recipe that is on the back of the package.

Mint Chocolate Delights
VeryBestBaking.com
  • 2 cups all-purpose flour
  • 2/3 cup Cocoa
  • 1 teaspoon baking soda
  • 1/2 teaspoon salt
  • 1 cup (2 sticks) butter or margarine, softened
  • 2/3 cup granulated sugar
  • 2/3 cup packed brown sugar
  • 1 teaspoon vanilla extract
  • 2 large eggs
  • 1 2/3 cups (10-oz. pkg.) NESTLÉ® TOLL HOUSE® Dark Chocolate & Mint Morsels
PREHEAT oven to 325° F.

COMBINE flour, cocoa, baking soda and salt in small bowl. Beat butter, granulated sugar, brown sugar and vanilla extract in large mixer bowl until creamy. Add eggs, one at a time, beating well after each addition. Gradually beat in flour mixture. Stir in morsels. Drop by well-rounded tablespoon onto ungreased baking sheets.

BAKE for 11 to 13 minutes or until cookies are puffed and centers are set. Cool on baking sheets for 2 minutes; remove to wire racks to cool completely.

FOR MINI MINT CHOCOLATE DELIGHT COOKIES: Prepare dough as above. Drop by well-rounded measuring teaspoon onto ungreased baking sheets. Bake for 9 to 10 minutes or until cookies are puffed and centers are set. Makes about 7 dozen mini cookies.

This is the picture from Nestle's website of the cookie...I forgot to take a picture.

Review: When I opened the bag of chips I was already in love with this cookies. It was just the perfect mint smell to me. Making the cookies was just as easy as making any chocolate chip cookie. I used the small cookie scoop I had for a couple of reason...one my larger scoop broke and two I figured smaller cookies would be better after eating a lot of turkey. It does make a ton using the smaller scoop and I was able to set some aside for our second Turkey dinner with my in-laws. These cookies to me taste just like the girl scout Thin Mint cookies. Which is awesome because if you ever have a craving for them you don't have to wait to order a package from your local girl scout. This is a keeper and I just hope I can find another bag before they disappear...

Thursday, October 15, 2009

Biscotti the King Arthur Flour way...

It is no secret that I checkout the Bakers' Banter everyday...sometimes more then once a day just in case they added something new. Their post on October 12th just spoke to me...just called to me and said "Michelle...you must bake right now and you won't be sorry." Who am I to argue with myself when I just make perfect sense. I had to run to the supermarket for something any way and picked up a package of the mini chips which was the only thing I was missing. I took out the butter to soften and then the night go away with me and I had to wait. Lucky for my I just had to wait one day and I was able to make them.

Black and White Biscotti King Arthur Flour

Ingredient
6 tablespoons butter
2/3 cup granulated sugar
1/4 teaspoon salt
1 1/2 teaspoons baking powder
2 teaspoons vanilla extract
2 large eggs
2 cups King Arthur Unbleached All-Purpose Flour
2 tablespoons cocoa powder, Dutch-process preferred
1/2 teaspoon espresso powder
1/2 cup chocolate chips, mini chips preferred
2 tablespoons coarse white sparkling sugar, for topping (optional)

Glaze (optional)
3/4 cup confectioners' sugar
1 tablespoon water

Directions
1) Preheat the oven to 350°F. Lightly grease (or line with parchment) one large (about 18" x 13") baking sheet.

2) In a medium-sized bowl, beat the butter, sugar, salt, vanilla, and baking powder until the mixture is smooth and creamy

3) Beat in the eggs; the batter may look slightly curdled.

4) At low speed of your mixer, add the flour, stirring until smooth; the dough will be sticky.

5) Divide the dough in half, leaving half in the bowl, and placing half on the prepared pan. If you have a scale, half the dough is about 10 1/4 ounces (290g). Volume-wise, half the dough is a generous 1 cup.

6) Shape the dough on the pan into a log that's about 14" long x 2 ½" wide. Straighten the log, and smooth its top and sides; a wet spatula or wet bowl scraper (or wet fingers) works well here. Place the pan in the freezer while you make the chocolate dough.

7) To prepare the chocolate dough, add the cocoa powder and espresso to the vanilla dough in the bowl, stirring to combine. Stir in the chocolate chips.

8) Remove the pan from the freezer. Using your wet fingers, spread the chocolate dough atop the vanilla dough, pressing it down the sides to entirely enclose the vanilla dough, if desired. You can also just leave the sides bare. Sprinkle the coarse sugar atop the dough, pressing it into the surface gently with your fingers.

9) Bake the dough for 25 minutes. Remove it from the oven, and allow it to cool on the pan anywhere from 10 to 25 minutes; just work it into the schedule of whatever else you're doing in the kitchen. While the biscotti are cooling slightly, reduce the oven temperature to 325°F.

10) If you've used parchment on your baking sheet, use it to lift the biscotti off the sheet onto a flat surface. If you haven't used parchment, carefully lift the biscotti off the sheet onto a flat surface. Using a serrated knife or sharp chef's knife, cut the biscotti crosswise into 3/4" slices. Or cut the biscotti on the diagonal — for fewer, longer biscotti. As you're slicing, be sure to cut straight up and down, perpendicular to the pan; if you cut unevenly, biscotti may be thicker at the top than the bottom, and they'll topple over during their second bake.

11) Set the biscotti, on edge, back on the baking sheet. Return the biscotti to the oven, and bake them for 30 to 40 minutes, till they feel very dry and are beginning to turn golden. They'll still feel a tiny bit moist in the very center, if you break off a piece; but they'll continue to dry out as they cool.

12) Remove the biscotti from the oven, and transfer them to a rack to cool.

13) If you haven't topped the biscotti with coarse sugar, glaze them once they're cool. Mix the confectioners' sugar and water, and drizzle it atop the biscotti.

Yield: 21 biscotti, about 4" to 5" long.

Review: I was excited to make these more for the way they looked because they just look so cool. I was really happy with the end result in both...they looked amazing and tasted great. To me it is nice to have both flavors in each bite. I also do not think they are super sweet and the chocolate actually helps with that part. It calls for a glaze or coarse sugar on top...I did not do either. I actually meant to put the sugar on them but totally spaced on that one. So I figured I would just glaze them then...I think I ate too many and my 3 year old just wanted them ASAP that I did not get the chance. I was half joking when I commented on their blog that I now want to make . Neapolitan version...maybe cut the batter into thirds and just color one pink...or increase the recipe to 1 1/2 times and then do that. I have to say this batter was super sticking and wetting your hands totally helps. I think this one is a keeper and I might add it to my holiday baking list.

Monday, July 27, 2009

Daring Baker's Challenge: Cookies


The July Daring Bakers' challenge was hosted by Nicole at Sweet Tooth. She chose Chocolate Covered Marshmallow Cookies and Milan Cookies from pastry chef Gale Gand of the Food Network.

Mallows(Chocolate Covered Marshmallow Cookies)
Recipe courtesy Gale Gand, from Food Network website

Prep Time: 10 min

Inactive Prep Time: 5 min
Cook Time: 10 min
Serves: about 2 dozen cookies

• 3 cups (375grams/13.23oz) all purpose flour
• 1/2 cup (112.5grams/3.97oz) white sugar
• 1/2 teaspoon salt
• 3/4 teaspoon baking powder
• 3/8 teaspoon baking soda
• 1/2 teaspoon ground cinnamon
• 12 tablespoons (170grams/ 6 oz) unsalted butter
• 3 eggs, whisked together
• Homemade marshmallows, recipe follows
• Chocolate glaze, recipe follows

1. In a mixer with the paddle attachment, blend the dry ingredients.
2. On low speed, add the butter and mix until sandy.
3. Add the eggs and mix until combine.
4. Form the dough into a disk, wrap with clingfilm or parchment and refrigerate at least 1 hour and up to 3 days.
5. When ready to bake, grease a cookie sheet or line it with parchment paper or a silicon mat.
6. Preheat the oven to 375 degrees F.
7. Roll out the dough to 1/8-inch thickness, on a lightly floured surface. Use a 1 to 1 1/2 inches cookie cutter to cut out small rounds of dough.
8. Transfer to the prepared pan and bake for 10 minutes or until light golden brown. Let cool to room temperature.
9. Pipe a “kiss” of marshmallow onto each cookie. Let set at room temperature for 2 hours.
10. Line a cookie sheet with parchment or silicon mat.
11. One at a time, gently drop the marshmallow-topped cookies into the hot chocolate glaze.
12. Lift out with a fork and let excess chocolate drip back into the bowl.
13. Place on the prepared pan and let set at room temperature until the coating is firm, about 1 to 2 hours.

Note: if you don’t want to make your own marshmallows, you can cut a large marshmallow in half and place on the cookie base. Heat in a preheated 350-degree oven to slump the marshmallow slightly, it will expand and brown a little. Let cool, then proceed with the chocolate dipping.

Homemade marshmallows:
• 1/4 cup water
• 1/4 cup light corn syrup
• 3/4 cup (168.76 grams/5.95oz) sugar
• 1 tablespoon powdered gelatin
• 2 tablespoons cold water
• 2 egg whites , room temperature
• 1/4 teaspoon pure vanilla extract

1. In a saucepan, combine the water, corn syrup, and sugar, bring to a boil until “soft-ball” stage, or 235 degrees on a candy thermometer.
2. Sprinkle the gelatin over the cold water and let dissolve.
3. Remove the syrup from the heat, add the gelatin, and mix.
4. Whip the whites until soft peaks form and pour the syrup into the whites.
5. Add the vanilla and continue whipping until stiff.
6. Transfer to a pastry bag.

Chocolate glaze:
• 12 ounces semisweet chocolate
• 2 ounces cocoa butter or vegetable oil

1. Melt the 2 ingredients together in the top of a double boiler or a bowl set over barely simmering water.

Review: I was very excited to make these cookies because I have always wanted to make my own marshmallow and finally had a reason to do it. I have to say my dough didn't come out that great and if I ever make these cookies again I would try a different cookie recipe. Maybe make my own graham crackers. Also I didn't do these at the right time of year...very humid and my chocolate never really set up right. I think the next time I would use dark chocolate and my use the candy melts my sister uses for her chocolate creations.

Thursday, May 14, 2009

Sugar Cookies aka Jacob Cookies

Mike has a friend named Tommy. Whenever we see him he calls me the cookie girl. So I told Mike the next time you see Tommy I'm going to make him a batch of cookies. I wasn't sure what kind of cookie person he was so I wanted to make something neutral.

Sugar Cookies


Dough

  • 3 cups King Arthur Unbleached All-Purpose Flour
  • 1 1/2 teaspoons baking powder
  • 1/2 teaspoon baking soda
  • 3/4 teaspoon salt
  • 1 cup (2 sticks) unsalted butter
  • 1 1/4 cups sugar
  • 1/4 cup cream cheese
  • 1 teaspoon vanilla extract
  • 1/4 teaspoon almond extract
  • 1 large egg

Topping

  • 3/4 cup sugar for dredging

Directions

Preheat the oven to 375°F. Lightly grease two baking sheets, or line with parchment.

1) In a medium bowl, whisk together the flour, baking powder, baking soda, and salt. Set aside.

2) In a large bowl, cream together the butter, sugar, and cream cheese until light and fluffy.

3) Beat in the vanilla and almond extracts, and the egg; scrape the sides and bottom of the bowl.

4) Add the flour mixture, and mix at low to medium speed until the mixture is evenly moistened.

5) Place the 3/4 cup sugar in a large plastic bag, or in a shallow pan. Scoop the dough by tablespoonfuls into the sugar, rolling them in the pan or gently shaking them in the bag to coat them with the sugar.

6) Place on the prepared baking sheets, leaving 2" between them.

7) Bake for 10 to 12 minutes. The edges of the cookies will just barely begin to brown.

8) Remove from the oven and cool on the pan for 5 minutes, before transferring to a rack to finish cooling completely.


Tip: If you like a chewier, moister, "bendy" cookie, add 2 tablespoons (1 3/8 ounces) corn syrup to the dough. The cookies will spread out a little more and be 1/4" thick once they're baked.


My Review: I've made this recipe twice and both time they came out really gooooood!!! I decided with half of the second batch to roll some of the dough in sprinkles (Jacob's favorite cookies). They came out great. I told my sister that Jacob would be jealous...hehe...I highly recommend this recipe and I will definitely make it again and again and again!

Thursday, March 5, 2009

Peanut Butter Chunk Cookies

I had a few reason why I wanted to make this month's cookie jar recipe from Everyday Food. One I love peanut butter and haven't had any homemade cookies in a long time. Two my son who just turned three is now able to have peanut stuff...so I wanted to introduce him to the wonderful world of peanut butter cookies. The third reason was it was going to snow on Monday and I though it would be nice to make some cookies.


Peanut Butter Chunk Cookies
  • 1 1/2 cups all-purpose flour (spooned and leveled)
  • 1 teaspoon baking soda
  • 1 cup peanut butter (smooth or chunky)
  • 4 tablespoons ( 1/2 stick) unsalted butter, room temperature
  • 1/2 cup packed dark-brown sugar
  • 1/2 cup granulated sugar
  • 2 large eggs
  • 1 teaspoon pure vanilla extract
  • 8 ounces semisweet chocolate, cut into chunks

Directions

  1. Preheat oven to 350 degrees. In a bowl, whisk together flour and baking soda; set aside. In a large bowl, using an electric mixer, beat peanut butter, butter, and sugars until light and fluffy. Add eggs and vanilla, and beat until smooth. With mixer on low, gradually add flour mixture, beating just until combined. Stir in chocolate chunks.
  2. Drop dough by heaping tablespoons, 1 inch apart, onto two large baking sheets. Bake until golden, 13 to 15 minutes, rotating sheets halfway through. Transfer cookies to wire racks to cool.
Review: I think this was a nice and easy recipe to make. The only thing I did differently was I used semi-sweet chocolate chips instead of chunks. I thought the taste of these cookies are great and I think I might use chunky peanut butter next time to give a little bit different texture to them. Everyone that had one loved them even my son who couldn't stop eating them.

Saturday, November 29, 2008

December Cookie Recipe: Chocolate Chippers

Christmas is my absolute favorite time of the year (followed by Halloween and Thanksgiving). I can remember baking cookies with my mom every year. She would bake batches and batches of cookies and put them in tins, which she would then serve for a Christmas party, Christmas Eve, and Christmas Day. She always made the same couple of cookies - Chocolate Chip, Mexican Wedding Cakes, Graham Cracker Yummies (my fav), Sugar Cookies (which of course, I always HAD to decorate), and Doggie Turds (of course, if you ask her, she'll say they are called Oatmeal Logs or something, but I know better - despite the name, they are a wonderful oatmeal and confectionary sugar based cookie dipped in chocolate and actually is a recipe passed down from Karen's mom).

Well, despite my mom's recipes, I am on the hunt for my own traditional cookies (p.s. Graham Cracker Yummies are always on my list). With December just a couple of days away and our yearly girl's baking weekend coming up in a few weeks, I thought I would start experimenting before the actual day, so I can figure out what I am going to make this year. Tonight, Biz and Justin invited us over for some fajitas and margaritas (yahoo!) and altho the Mexican Wedding Cakes probably more fit the bill, I took a look in my trusty BH&G 1965 ed. "New Cook Book" and stumbled across a cookie called the Chocolate Chippers. I have been craving a chocolate chip cookie (sorry, ladies, not THAT kind of craving ;) and this one seemed to fit the bill.

My mom always had a copy of the BH&G cookbook around when she baked. As I use it more and more, I think it may have been moreso because they use a lot of Crisco in their baking. My dad is lactose intolerant and Crisco is perfect, because there is no trace of milk products (aka butter) and if there was butter, she would use margarine or non-dairy creamer instead of milk. I don't think I started using butter until a few years ago when I realized the flavor was that much better (and no trans fats!). Of course, in this day and age, fortunately unlike some other allergies, my dad can use Lactaid and safely ingest milk-based products (although he still doesn't drink a glass of milk, but then again never did, even before he became lactose intolerant, which started when he was 18, but the doctor didn't diagnose him until he was 28!).

Anyhow, as usual I digress, one lifesaver that Crisco has come up with is their individual Crisco sticks. These things are excellent! No more buying the big tub, which I would never use before it went bad (is that possible with this stuff?!) and scooping it into a measuring cup and then back out into the mixer (you get the idea), now you just cut it like you would cut a stick of butter. Yes, you pay more for convenience, but it is one convenience I don't mind!

Chocolate Chippers

Ingredients:
1/2 cup shortening
1/2 granulated sugar
1/4 cup brown sugar (I used dark brown)
1 egg
1 tsp. vanilla
- - - - - - - - - - - - - - - - - - - - - - - - - - - - - - - - -
1 cup sifted all-purpose flour
3/4 tsp. salt
1/2 tsp. baking soda
1 cup semi-sweet chocolate pieces (I used Nestle Chocolate Chips)
1/2 cup broken/chopped nuts (optional, I omitted)

Oven 375 degrees

Directions:
- Cream together shortening, sugars, egg, and vanilla till light and fluffy.
- Sift together dry ingredients; stir into creamed mixture, blending well.
- Add chocolate pieces and nuts. If desired, add 1/2 cup crushed peppermint stick candy.
- Drop from teaspoon 2 inches apart on greased cookie sheet.
- Bake 10-12 minutes.
- Remove from pan immediately.

Review: I absolutely LOVED these cookies. I will definitely make again this Christmas season. Now, BH&G says the recipe makes 3.5 dozen. I didn't come close to this. I used the medium cookie scoop (also from Pampered Chef) - p.s. I will never do cookies any other way; I used to use the 2 spoon method - you know, the way your grandmother or mom would have taught you back in the day, scoop some cookie mix and then use the other spoon to drop it onto the cookie sheet - no longer necessary with a good metal scoop!! Anyway, I used the medium scoop and only got 21 cookies out of it. Needless-to-say, I will probably at least triple the recipe when I make it for the holidays (as hope to give away some cookies as well). I also tried a new feature on my stove, which I haven't used in the past - the Convection Bake option. When you put in 375, it automatically drops it to 350. I don't know if it made the cookie better or not, but I definitely think I will try this feature again. I hope you enjoy these cookies as well!

Friday, November 21, 2008

KAF Soft Molasses Cookies

For a while now I have been wanted to make some kind of molasses cookies. One reason was because my husband requested them. Another reason was because I bought a jar of molasses thinking I didn't have any in the house...to only find out that I had a jar at least 3/4 full. So I figured this would be a good way to use up some of that molasses. I was also thinking about making a gingerbread house this year for the holidays but with an almost 3 year old boy in the house...it isn't going to happen.
I actually had this recipe bookmarked for a while now but what made me decide to make it was that it was today's post on the King Arthur Flour blog...Bakers' Banter. I was also having company over on Monday for brunch and though this would make a great addition to my other desserts.


Review: This is an easy to make cookie recipe in every way. I also think by using a cookie scoop it makes it all that much easier. I rolled mine in a combination of sugars...course sugar, granulated sugar, both course and granulated and none at all. By far to me the course sugar wins it because it adds a nice crunch to this cookie.

Monday, February 25, 2008

Dutch Windmill Cookies

I was at Mrs. Pennings on Sunday and she made me some tea ( coffee for her and Kevin ) and she served us these Dutch Windmill Cookies. They are awesome!! They taste like a gingerbread cookie. I tried to read the box, but it was in Dutch =). Kevin said he grew up on these cookies and they were one of his favorites. They were perfect for dipping in a nice hot cup of tea. I'd love to find a recipe for cookies like these. I'll have to do some serching and see what I can find. If anyone out there has one and wouldnt mind passing it along, I'd be grateful. I've had other really good Dutch treats over there...one of these days I'll ask Mrs. Pennings how to make some of them. I know Kevin loves them, and he's not a hugh sweets fan. I've noticed the Dutch treats arent too sweet.

Wednesday, February 13, 2008

Snickerdoodles for my Snickerdoodle


So every year I make something for Mike for Valentine's Day. I was going back and forth on what to make him. I finally settled on Snickerdoodles. Something that I have been wanting to make and since he's not a big fan of chocolate stuff I figured these cookies would be perfect.


INGREDIENTS

  • 1/2 cup butter, softened
  • 1/2 cup shortening
  • 1 1/2 cups white sugar
  • 2 eggs
  • 2 teaspoons vanilla extract
  • 2 3/4 cups all-purpose flour
  • 2 teaspoons cream of tartar
  • 1 teaspoon baking soda
  • 1/4 teaspoon salt
  • 2 tablespoons white sugar
  • 2 teaspoons ground cinnamon

DIRECTIONS

  1. Preheat oven to 400 degrees F (200 degrees C).
  2. Cream together butter, shortening, 1 1/2 cups sugar, the eggs and the vanilla. Blend in the flour, cream of tartar, soda and salt. Shape dough by rounded spoonfuls into balls.
  3. Mix the 2 tablespoons sugar and the cinnamon. Roll balls of dough in mixture. Place 2 inches apart on ungreased baking sheets.
  4. Bake 8 to 10 minutes, or until set but not too hard. Remove immediately from baking sheets.

My Review: This was an easy recipe to make. I haven't given them to Mike yet, so I don't know if likes them . But I have already sampled two cookies. They are yummmy. I was also pleased that the recipe actually made about 40+ cookies. Definitely something to add the keeper pile.

Rain Rain Go Away...

Well today started out interesting when I went out to help Mike shovel the driveway. It was getting late and I knew he needed to get to work and was wondering what was taking him so long. I quickly found out that that bottom of our driveway was flooding. It happens when we get a lot of rain and usually not a big deal but since there was so much snow/ice on the edge of the driveway the water really had no where to go. We did as much as we could and just had to let it be because we really weren't getting any where.

I looked out the window an hour later to see that the water was getting a little too close to the house. So I put Jacob in his room and headed outside to see if I could do anything...no luck but the good thing was it was at the point where it wasn't getting any deeper.

I was feeling a little worried so I decided to take my mind off it with baking Chocolate Chip Cookies. Then I remembered that Mike gave up sweets for Lent and couldn't eat them. So I just baked a few and froze the uncooked dough for after Lent. I hope I forget about them because now it is too easy to have fresh baked cookies when ever I want them.


During the past holiday season I bought a bigger cookie scoop then the one I love. I got a plastic on from Wilton that was cheaper in price then the metal one I have. Well I am going to back to Bed Bath and Beyond and get the bigger metal cookie scoop. I found that it worked better then the plastic on and to me that is worth the money. The picture above is my test to see which size cookie I wanted to make...I went for the bigger one...which is nice a chewy. The smaller one came out flat.

Friday, February 1, 2008

"Lost" Fish Biscuits =)


There is a very funny story to these cookies. Anyone who knows me, knows my brother Eric. Anyone who knows my brother Eric knows he's totally obsessed with the show Lost on ABC. As a joke he asked me to make these Fish biscuits ( fish biscuits are the treats Sawyer got when he was locked in the cage by the 'others ). I jokingly told Eric, if he found me a recipe for 'fish biscuits' I'd try to make them for him to eat while watching the Lost premier last night. It shouldnt have suprised me that he found a website that had a recipe for these wonderful treats. I pretended like I didnt get his email with the recipe, but I had printed it out and Weds night after seeing you girls at Jenns grandfathers wake, I got home at about 9pm and started making my 'fish biscuit' dough ( the recipe said to keep it refridgerated for at least 4 hours ). Thursday I rushed home after work and quickly began prepairing these cute treats. I was in a bit of a hurry, so they didnt come out as good as I'd hope. Not that they didnt taste good, they did, but if I'd had more time I could have made them look a little nicer. The pictures above are of the finished product. My wonderful Fish Biscuits!!! LOL. My brother was hysterical when I walked into his house with these, as I think you can tell from the picture of him above :).
I would highly recommend trying these cookies, they were pretty easy and quite tasty. The recipe I used is as follows:
Citrus sugar cookie dough
2 cups unbleached all purpose flour
1 1/2 teaspoons baking powder
1/4 teaspoon salt
3/4 cup (1 1/2 sticks) unsalted butter, room temperature ( I used margaine )
1 1/4 teaspoons grated lemon peel
1 1/4 grated tangerine peel or orange peel
1/2 cup sugar
1/4 cup powdered sugar
1 large egg
Once the dough is made, keep it refridgerated at least 4 hours. It has to be chilled to roll out the right way. The cookies should be about 1/2 an inch thick before baking. Look at this womens site below...she tell you alot if you really want to make these.
Here is the website I got all this from:
She's got an awsome site, you can print out templates of the fish and she has the recipe there too. Check it out, its pretty cool.
Enjoy your fish biscuits everyone!!!

LinkWithin

Related Posts with Thumbnails